Qi Family Classroom: Seven Steps for Wall-Mounted Toilet Installation
Seven steps for wall-mounted toilet installation:
1Adjust the height of the tank
Side press water tank: According to the thickness of the decorative layer Xcm, from the horizontal white line in the upper part of the bracket to the bottom of the adjustable foot of the bracket is 100cm + Xcm.
Top-mounted water tank: According to the thickness of the decorative layer Xcm, from the top of the bracket to the adjustable foot bottom of the bracket is 82cm + Xcm. The bracket adjustment foot can only be adjusted to 20cm maximum without special lengthening.
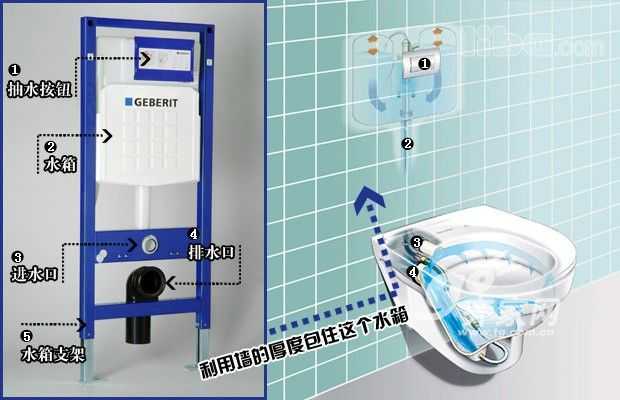
2
Fixing screw
The water tank bracket installation is mainly fixed by 4 screws, two upper brackets and two supporting feet; at the same time, all screws on the tank bracket must be fastened.
When installing, ensure that the tank bracket is horizontal and vertical.
3
Water supply pipe connection
The tank inlet water application indoor water supply pipe (hard pipe) is connected to the water tank inlet angle valve.
It is forbidden to install the matching angle valve inside the tank outside the tank so as to avoid opening and closing the angle valve when the tank is being cleaned and maintained.
It is forbidden to connect the water supply pipe and the tank angle valve with a hose. The pressure of the pipe and the quality of the hose may cause leakage. In case of leakage, the false wall must be destroyed to repair.
4
Drain installation
If using the original pit to install concealed water tanks, the short pipe connecting the water tank and the drainage pipe must be larger than φ90 to prevent clogging.
5
Protection device installation
All protective devices should be installed prior to the fabrication of the false wall and the installation of the decorative layer.
The screw protection hose is installed and divided into two parts, which are sleeved on the front and the back of the screw respectively to avoid plugging the screw hole when installing the false wall or installing the decorative layer.
Fake wall production
(1) Light steel keel + moisture-proof gypsum board
The surface of the light steel keel and the tank bracket shall be flat, and the position of the tank protection frame, flush pipe, drain pipe and screw shall be reserved on the gypsum board. The surface of the gypsum board shall be tightly attached to the surface of the bracket and fixed. The water tank bracket shall be filled with bricks or concrete below the elbow of the toilet to avoid cracking of the decoration material when the toilet is used because the plaster board is not in close contact with the bracket.
(2) Gray brick + steel mesh
Bricks are placed on the edges of the tank brackets and gaps to maintain a smooth surface with the brackets. The tank holder is sealed in place with a wire net slightly larger than the bracket, and the wire mesh is fixed on the brick wall. If necessary, two layers of steel mesh can be sealed.
(3) Red brick
The red bricks are sealed at the edge of the water tank bracket and at the gaps. A red brick wall of about 50 mm is built in front of the water tank. The positions of the water tank protection frame, flush pipe, drain pipe and screw are reserved. The minimum thickness of red brick is about 50mm.
7
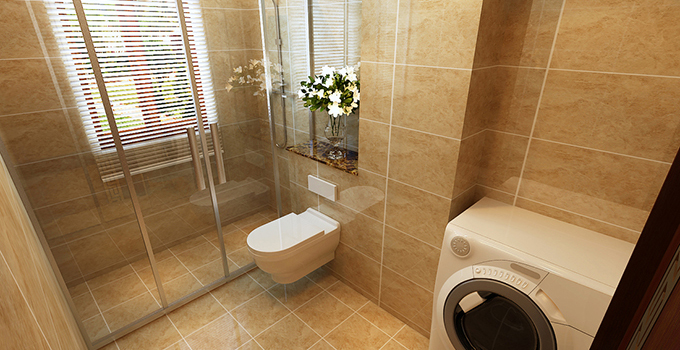
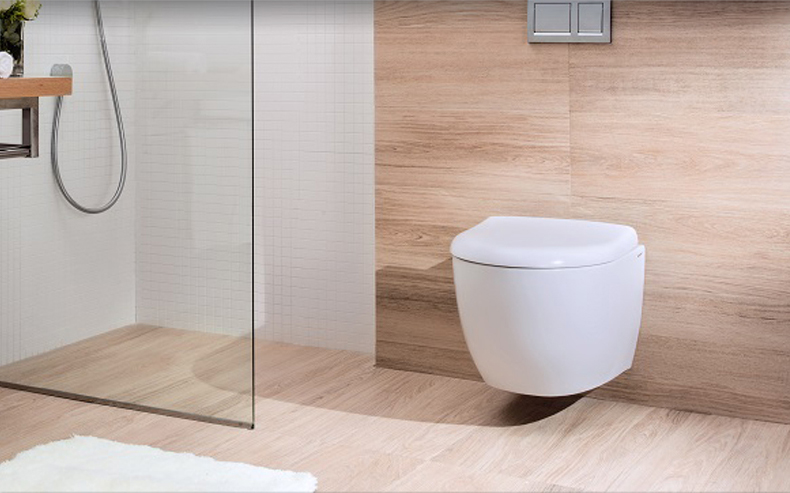
Hanging toilet installation
After the false wall decoration is completed, the tiles are already attached.
Attach the soundproof mat to the decorative wall.
Measure and cut the pipe, then install the toilet according to the screw position.
The screw length exceeds the ceramic surface and fixes the toilet to the wall.
When installing a wall-mounted toilet, pay attention to adjust the horizontal position of the toilet.
After the installation is completed, cut off the excess sound insulation mat and you're done.
Conclusion: The wall-mounted toilet is not only flexible in installation, but also beautiful in appearance, and it is also very easy to clean and save. If your home is missing a toilet, consider a wall-mounted toilet.Construction Acceptance Renovation Process Space Effect Drawing Toilet Decoration Space Arrangement Interior Decoration Red Brick Bathroom Tiles Overall Toilet
Boiler Steel Pipe,High Pressure Boiler Steel Pipe,Condensers Steel Pipe
,Square Pipe Steel Tubes CO.,Ltd , http://www.ns-pipefitting.com